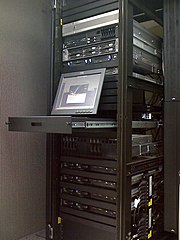
By default, the standard LAMP (Linux Apache Mysql Php/Perl/Python) stack doesn’t come particularly well optimised for handling more than a trivial amount of load. For most people this isn’t a problem, either they’re running on a large enough server or their traffic is at a level that they never hit against the limits.

Anyway, I’ve hit against these limits on a number of occasions now, and while there are many good articles out there on the subject, I thought I’d write down my notes. For my own sake as much as anything else…

Apache

Apache’s default configuration on most Linux distributions is not the most helpful, and you’re goal here is to do everything possible to avoid the server having to hit the swap and start thrashing.

  • MaxClients – The important one. If this is too high, apache will merrily spawn new servers to handle new requests, which is great until the server runs out of memory and dies. Rule of thumb:

    MaxClients = (Memory - other running stuff) / average size of apache process.

    If you’re serving dynamic PHP pages or pull a lot of data from databases etc the amount of memory a process takes up can quickly balloon to a very large value – sometimes as much as 15-20mb in size. Over time all running Apache processes will be the size of your largest script.

  • MaxRequestsPerChild – Setting this to a non-zero value will cause these large spawned processes to eventually die and free their memory. Generally this is a good thing, but set the value fairly high, say a few thousand.
  • KeepAliveTimeout – By default, apache keeps connections open for 15 seconds waiting for subsequent connections from the same client. This can cause processes to sit around, eating up memory and resources which could be used for incoming requests.
  • KeepAlive – If your average number of requests from different IP addresses is greater than the value of MaxClients (as it is in most typical thundering herd slashdottings), strongly consider turning this off.

Caching

  • SquidSquid Reverse Proxy sits on your server and caches requests, turning expensive dynamic pages into simple static ones, meaning that at periods of high load, requests never need to touch apache. Configuration seems complex at first, but all that is really required is to run apache on a different port (say 8080), run squid on port 80 and configure apache as a caching peer, e.g.


    http_port 80 accel defaultsite=www.mysite.com vhost
    cache_peer 127.0.0.1 parent 81 0 no-query originserver login=PASS name=myAccel

    One gotcha I found is that you have to name domains you’ll accept proxying for, otherwise you’ll get a bunch of Access Denied errors, meaning that in a vhost environment with multiple domains this can be a bit fiddly.

    A workaround is to specify an ACL with the toplevel domains specified, e.g.

    acl our_sites dstdomain .uk .com .net .org

    http_access allow our_sites
    cache_peer_access myAccel allow our_sites

  • PHP code cache – Opcode caching can boost performance by caching compiled PHP. There are a number out there, but I use xcache, purely because it was easily apt-gettable.

PHP

It goes without saying that you’d probably want to make your website code as optimal as possible, but don’t spend too much energy over this – there are lower hanging fruit, and as a rule of thumb memory and CPU is cheap when compared to developer resources.

That said, PHP is full of happy little gotchas, so…

  • Chunk output – If your script makes use of output buffering (which Elgg does, and a number of other frameworks do too), be sure that when you finally echo the buffer you do it in chunks.

    Turns out (and this bit us on the bum when building Elgg) there is a bug/feature/interaction between Apache and PHP (some internal buffer that gets burst or something) which can add multiple seconds onto a page delivery if you attempt to output large blocks of data all at once.

  • Avoid calling array_merge in a loop – When profiling Elgg some time ago I discovered that array_merge was (and I believe still is) horrifically expensive. The function does a lot of validation which in most cases isn’t necessary and calling it in a loop is ruinous. Consider using the “+” operator instead.
  • ProfileProfile your code using x-debug, find out where the bottlenecks are, you’d be surprised what is expensive and what isn’t (see the previous point).

Non-exclusive list, hope it helps!

The Raspberry Pi is a tiny, solid state, and ludicrously cheap hobby ARM based computer designed in the UK (but thanks to insane UK tax laws needs to be built in China). It has a USB port, video, sound, an Ethernet port, 256MB RAM, and can run 3 distinct flavours of Linux.

Ostensibly the device was developed with the aim of getting kids to code, and as someone who grew up with the UK hobby computing scene of the 1980s and cut their programming teeth hacking games together on the ZX Spectrum, this is something I can thoroughly get behind.

The blurb from their website:

The Raspberry Pi is a credit-card sized computer that plugs into your TV and a keyboard. It’s a capable little PC which can be used for many of the things that your desktop PC does, like spreadsheets, word-processing and games. It also plays high-definition video. We want to see it being used by kids all over the world to learn programming.

Coming out of Cambridge and with a decidedly hobbyist feel to it, the Raspberry Pi could almost be the spiritual successor to the humble and much loved Speccy. If it can get more kids coding then that’s all for the good, especially if it gives the UK tech scene a much needed shot in the arm.

This is not the reason why I’m excited.

Small. Capable. CHEAP.

The Raspberry Pi is tiny, which means it can be put in tiny things. It is low power and solid state, which means it doesn’t need much juice to run (4 AA batteries will do the trick) and it can take a fair amount of abuse.

Above all, it is cheap, and this is why I’m really excited. They are certainly something you can afford to buy more of than a traditional computer, even on a modest budget. I’d go further and say that they are so cheap that they can be thought of as practically disposable general computing units… this is game changing.

The reason I am really excited about this is that all these factors combine to make them the perfect choice for the control computer for any number of appliances or devices, and it reduces the barrier to entry for the home hacker to start putting some really cool things together.

I don’t think it will be long before we start seeing countless hobbyist developed bits of hardware; from internet radios, to cheap NAS appliances, right through to remote sensor platforms, robots, drones and maybe even spacecraft. Given the number of bits of Lego sent to the edge of space recently I don’t think this is too far off!

Increasingly you don’t need to wait for a company with a massive fabrication plant to see a market for a product in order to get one, but now micro-manufacturing is something you can do in your own home. I can think of hundreds of gizmos I could spend countless afternoons building with a Raspberry Pi at the centre.

I can’t wait to get my hands on one!

Apple Airprint is a technology (a zeroconf implementation under the bonnet) which allows apple devices to detect, configure and print without any overt configuration on the part of the user.

The bad news is that in only works for a handful of airprint printers natively. But never fear, Linux to the rescue!

At this point I’m going to assume that you have a Linux box somewhere on your network acting as a file and print server (pretty regular kit in most geek homes).

Set up your printer

The first step is to set up CUPS on your linux server and then installing the appropriate printer driver for your printer.

I won’t go into detail here as there are numerous guides out there on the wider web, but mostly this is a matter of installing cups and foomatic and then visiting the cups configuration website on the server (localhost:631 usually) and adding your printer.

Make sure that the printer is shared. Print a test page.

One gotcha I found is that my default configuration only allowed connections from the local machine, even though the printer was marked as shared (although frankly I was cheating since most of my computers printed to my server over a Samba relay, but that’s by the by).

Take a look at /etc/cups/cupsd.conf and make sure that has an Allow From from your local network. E.g.


<Location />
Order Deny,Allow
Deny From All
Allow From 127.0.0.1
Allow From 192.168.0.0/24
</Location>

Export the printer

The next step is to install the zeroconf demon, which is called Avahi. This varies from system to system, but on debian this is pretty much a matter of apt-getting avahi-daemon. You may also want avahi-discover so you can browse the exported devices on your network.

Assuming you’ve correctly set up and shared your printers in CUPS the next step is to generate an avahi configuration for it. Thankfully, there’s a handy Python script called airprint-generate, available on github which does much of the donkey work.

Copy the resultant file to /etc/avahi/services and restart the avahi demon.

If your printer is password protected, you will want to add a <txt-record>air=username,password</txt-record> field to the file before doing so. Where username and password is the literal cleartext strings sent.

Profit!!!

Theoretically that should be it. After the configuration, and restarting the various demons involved your printer should be available to the various iOS devices kicking around your network.

Let me know if you have any questions!

Update for IOS6 users

If you are using IOS6 and are seeing a “no airprint printers found” when you try and print (even when ios5 devices can print fine), you must make a small configuration change to CUPS.

Create two extra files in /usr/share/cups/mime:

airprint.types

image/urf urf string(0,UNIRAST<00>)

airprint.convs

image/urf application/pdf 100 pdftoraster

Then restart CUPS before regenerating the avahi configuration file for your printer using airprint-generate as documented in the steps above. Replace your existing avahi printer configuration with this new one and restart avahi.

You printer should now be visible again to both ios5 and ios6 devices via airprint.