6a0120a85dcdae970b016301e98de2970d-800wi One of the good things to come out of the recent revelations that the NSA have been doing what we always supposed that they might be doing, as well as our lot pushing ahead with ill conceived plans to do the same, is that it has made the public at large much more aware of the need to protect themselves online. It has also acted as a spur for many of us in the tech community to pick up our game a little, and to work to better protect ourselves and others online by redoubling our efforts to finally stamp out cleartext communication protocols.

The humble email, sent for the most part in the clear and readable to everyone, is one of the last legacy unencrypted technologies still in common use. These days HTTPS can be being switched on for just about everything, and it is considered the height of irresponsibility in the tech community to still use telnet or ftp.

Technologies for securing email have been around for decades, but haven’t seen widespread adoption. PGP is the canonical example, however s/mime, which does the same job and is often forgotten about, may be more practical for most people, for two main reasons: 1) most mail clients have native support, including native support in iOS, 2) it does a much better job at key exchange, in the most part handling it transparently (as long as you have the “sign email” option turned).

Setting it up is still far from a one click “make my email secure” button, but once set up it is transparent and easy to use, so there is very little reason not to do it if you’re reasonably tech savvy (or know someone who is who can help you). Even if you use one of the NSA’s free webmail services (gmail et al), providing you don’t use the webmail interface to read your email, you can still set this up.

What this won’t do

Even if your email is encrypted, there are a number of gotchas which you should be aware of…

  • It relies on both parties switching on encryption – this is an age old issue.
  • Subject lines are never encrypted.
  • The spooks and other ne’er do wellers can still see who you contacted and when, leaving you vulnerable to being caught by the inevitable guilt by association fallacy that such mass surveillance programs are guaranteed to produce.

Setting up S/MIME

  1. Obtain a signing certificate: Unlike PGP, which relies on self generated keys and a web of trust to establish authenticity, S/MIME relies on signed certificates in the same way as HTTPS does. These are in many cases free to obtain. I currently sign my emails with a Comodo certificate obtained via their handy online form.
  2. Collect your certificate: Next, you need to collect your certificate, this is done via your web browser, and is possibly the most confusing step. You must visit a link, and your browser will generate and install a certificate into itself. What this means is that once you’ve clicked on the link, you should get a message along the lines of “Certificate from xxxx installed”, but you won’t be able to directly use it in your email client. You must also use the same browser on the same computer throughout the whole signup and retrieval process, which caught me out.
  3. Export your certificate: In order to be able to use your new certificate to sign and encrypt email, you must first export it as a certificate file. From your browser, visit your advanced settings and export the certificate. In chrome, this is under Settings -> Advanced -> Manage certificates. Save it somewhere safe, give it a password you’re going to remember.
  4. Import the certificate into your mail client: Here’s how on thunderbird, OSX/ios, outlook.

If you’re tech savvy, this isn’t too painful a process, and once it’s done its done (at least until the certificate expires). If you’re not, then I think it is up to those who are to help. Stamping out unencrypted communication protocols can be considered a civic responsibility in tech circles.

Hand holding is a start, however I see absolutely no reason whatsoever that this process can’t be made into a nice click button wizard. For the most part, S/MIME is natively supported in all modern mail clients, so is it not high time that the setup process was made a good deal simpler? Why on earth is this not all done by the setup wizard?

As a community, lets make a pledge to make this better and to stamp out clear text communication protocols once and for all, making security an invisible process for everybody. What do you say?

Home.API The modern world is full of cool gizmos, but our houses are pretty primitive by comparison.

Still, more and more houses are getting water and electricity smart meters of one sort or another. Various new home automation, like the Belkin Wemo, are hitting the market, and that is not to mention all the home brew efforts that various hackers are putting together themselves.

As you can see from other posts on this blog, I’ve been having a bit of fun playing around my Current Cost smart electricity meter, as well as playing around with the Raspberry Pi and PiFace, which has got me thinking about building a number of appliances around the place to solve a number of real world problems around the house – monitoring and controlling a number of things (I’ll post some more on this later).

So, problem is, all these devices have their own ways of talking to them, reading data and controlling them, and I thought it’d be cool if we had a common and easily extensible API, which you could talk to using standard web technologies. Having such a platform would enable people to start wiring things together in unexpected ways, using a variety of different devices, the more apis get added the more possibilities you have!

Introducing Home.API

Hacked together as an itch-scratching weekend project, Home.API is my first stab at solving the problem. It is a PHP 5.3+ web app that runs on a web server and is designed to be easily extensible through simple plugins and human readable configuration files.

Out of the box it includes a couple of demo plugins, and a simple dashboard, although the real power comes from its extensible JSON API which can be accessed by simple web calls.

Key features

  • Simple plugin format and configuration files.
  • Wire up the API in a branch structure which suits, use each plugin multiple times.
  • Simple but powerful development dashboard.
  • Currently a JSON API, but trivial to extend to other output formats using a powerful template system.

Format of an endpoint definition file

You API is defined using one or more configuration files in the /def directory. The configuration file contains a number of entries, separated by blank lines, each one defines the endpoint, class to use, and any initialisation parameters.

E.g.

/bedroom/light
    class \x10\DimmerLight
    minvalue 0
    maxvalue 50
    deviceIP 192.168.0.45

/hallway/light
    class \x10\DimmerLight
    minvalue 0
    maxvalue 100
    deviceIP 192.168.0.46

Making a call

Making an API call is simply a matter of making a call to a URL http://my.home.api/api/your/endpoint/function.format?param1=xxxx¶m2=yyyy, where function.format is the exposed method of the plugin class, and format is the template to use (e.g. json).

Each of these endpoints can act independently, and in our example you might be able to execute commands like:

http://home.local/api/bedroom/light/currentLevel.json

or

http://home.local/api/bedroom/light/setting.json?level=20

or

http://home.local/api/hallway/light/off.json

Have a play, and let me know what you think!

» Visit the project on Github…

experiment 2 - traffic lights In the last experiment I wired up LEDs to each one of the PiFace’s outputs and cycled through them. In this one, I decided to try a slightly more “real world” application, and build a set of traffic lights.

Since I live in the UK, these are the UK three light traffic lights (red/amber/green) and follow the UK light sequence – RED, RED/AMBER, GREEN, GREEN, AMBER, RED.

The Circuit

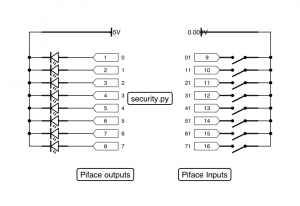
The circuit here is very similar to the one used for the previous experiment, but will only use six of the available eight control outputs. Each light contains a set of three LEDs connected to one of the pins of the PiFace’s output interface, one red, one amber and one green.

See the attached diagram.

The Software

The code for this experiment is where the extra complexity resides, since we must drive each light in the correct sequence and obeying certain rules:

  • The lights must transition in the correct, UK, sequence, i.e. RED, RED/AMBER, GREEN, and then GREEN, AMBER, RED.
  • For traffic safety, the green light must transition to red before the red light transitions to green.

To avoid repeating myself, I created a simple class to drive the lights.

Each class is initialised with the pin number of each light, and an initial status. The Toggle method will transition the light; RED, RED/AMBER, GREEN if status is RED, and GREEN, AMBER, RED if status is GREEN.

The main loop of the program waits for a period of time, then toggles the lights, starting with the green one.

Here we have it in action…